January 14, 2013

Crepes {recipe}


I have been craving crepes lately. 
It goes like this: 'Womb service. Yes, Can I please order some crepes filled with farmers cheese and strawberries. What's that? Whipped cream? Suuuure... send that can of whipped cream up!"
So, I have been making them every night, and the hubs loves it.
He loves the new and improved, always-hungry version of myself. 
He is benefiting a great deal from this whole pregnancy thing and keeps saying that maybe I shouldn't go to work after all, stay at home and make delicious food, while I'm making babies. Well that's new.
This recipe is as simple and easy as it gets. In Russian food there is a version of these, but much fattier and has sour cream in the batter.
I like them both ways but this is my go-to recipe. 
We eat them as a dessert (above picture) or plain for breakfast. Whatever you fancy, can dress them up with everything from fruit to Nutella. 
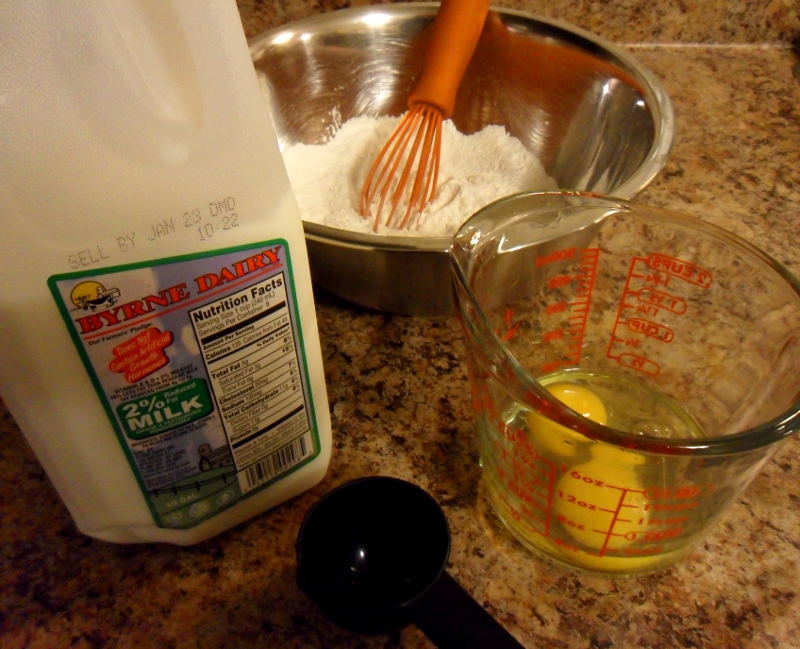
Ingredients:
- 1 1/2 cup of all purpose flour
- 2 eggs
- 1 tbsp sugar
- 1 1/2 cup of milk
- 1 tbsp butter
- pinch of salt

In a medium mixing bowl sift together flour, sugar and salt. In a separate bowl beat the eggs with fork and add milk to combine. Pour the milk mixture into flour while constantly mixing it with a whisk. Don't stop until there are no more lumps left. If needed add a little more water/milk. The batter should even consistency and not thick.


Heat up a small non-stick frying pan on medium heat and coat it with a butter. Pour 1/4 cup of batter into the pan and swirl evenly. 


***You don't need to use spoon/spatula to smooth it out, just swirl until the entire pan is coated with batter and it isn't moving anymore. 
Allow 1 minute on the first side and when flipped, about 30 seconds on the other. 

Cheese Filling:
- 1/2 lb  of farmer's cheese 
- 1 tbsp whipped cream cheese
- 3 tbsp of sugar
- 1 tbsp sour cream
- 1 tsp vanilla extract

Mix the farmer's cheese and cream cheese together, then add sour cream, next add sugar and vanilla. Place 1 tbsp (or more ;-) of cheese mixture into each crepes and fold. 


Melt about 1 teaspoon of butter in a skillet and sauté the folded cheese crepes on medium heat until light brown on both sides. They don’t take long to sauté. Be careful not to burn them.

Refrigerate crepes that aren't being served.  They keep in the fridge for almost one week, or you can freeze them up to 2 months. Sometimes I make couple batches and freeze them for easy breakfast solution later.

Wash strawberries and cut into desired pieces. Add a little bit of strawberry preserves or topping and mix. Pour strawberries into crepes, sprinkle with almonds and top with whipped cream. 


Enjoy!
...then go back for seconds. 


January 9, 2013

His Little Sheep

cribPottery Barn, lamp: DIY
How sweet is that vintage rocking horse? 
The nursery isn't finished yet, but I thought I'd share how it's coming along.
Whatcha think?

At this point almost everything is ready for the arrival of our little bundle of joy. 
Almost being the key word here. 
I don't think you can every be fully prepared for such a drastic change in your entire life. I mean, no matter how many maternity books or child-rearing books you read, you don't know what birthing pain feels like, or that 3am feeding when you are completely exhausted or that baby that just wouldn't stop crying and you don't know why (and it's breaking your <3). 
I know that I'm not ready. 
I try to imagine how it's all going to be, how we are going to love and care for our little one but until you have him in your arms, I guess no amount of imagination will get you to that experience. 
I love setting up the nursery but not so much the process of picking out a travel system. It only took us eight months to pick a carseat and a stroller! I think we picked our last car faster than this. Go figure
I love getting all kinds of advice - from not to ever introduce baby to a bottle to the horror birth stories of Soviet Russia. It's all very interesting and sometimes very disturbing. 
I love scouting for wall art and other accessories at local stores but get easily frustrated because girls have waaaay more stuff out there. There is tons of pink cute things. Not so much with the boys - it's either blah or not there at all. 
I love the way my belly moves and when my hubby and I are talking he get's so active I'm afraid he's going to pop right out. Then hubby gives him the talk - "now son, be nice to your mommy and settle down". It's so sweet and so precious! 
I love walking into that sparkling clean and super organized (not for long) nursery and admiring my handy work and his little sheep.
Than you for reading lovelies! 


January 7, 2013

Little Lamb Nursery Mobile (DIY)

 It Has a Story

I have been on a hunt for a perfect crib mobile for a while. First of all I didn't want a zoo-themed nursery and nothing with monkeys either. I wanted something simple yet elegant and boyishly cute. 
The very first year my husband and I were married, I was shopping some post-Christmas sales and found most adorable sheep at Bath and Body Works, of all places (go figure). They had mamma sheep and two little lambs, with a matching lamb blanket. I knew then and there that whenever we decide to have a baby, I would love to have some lambs in the nursery.
 So I bought them, kept them for four years in the back of my closet and now I'm so glad I did.
So I had these plush big sheep but no mobile to match it. This mobile was the closest I could find to something that would match the room colors and style of the nursery. But paying $62 for a mobile (you have to buy the arm separately) was a bit ridiculous. I was already getting some nice (i.e. expensive) bedding so that price was not for me. 
Of course, turning to PINTEREST and Etsy (also too expensive) I decided to make the mobile myself.
 But then there was the issue of little lambs (kind of the most important part of the whole thing). I couldn't find any that would be the perfect size for a mobile until my sister gave me her Christmas present.
She knew I wanted to add lambs into my nursery and found little ones (again) in Bath and Body Works. They were so cute and the perfect size! She gave me three little lambs, so I went to Bath and Body Works store right after Christmas and bought all the little lambs that they had. Eight in total, I had what I needed to make the most adorable mobile, and it was going to be one of a kind. 
Here is how. (Assuming you have the pieces to hang on your mobile)

You Will Need:
Pieces to Hang (It can be anything)
Scissors 
Embroidery Hoop (I used 10") from Hobby Lobby
Needle and Thread
Hot Glue Gun
Ribbon (I used golden 3/8")

Ready to start? 
So first I took all the tags and hooks off the sheep. Then using a needle and a thread, I sew single 20'' ribbons to them. My longest sheep was going to hang at 18" so the rest were just going to get cut. I this point I didn't know how many where going to be where, so I cut them all at the same length. 


And then I got tired of doing it all in quiet and all by myself and decided to watch some TV. And totally forgot to take pictures of the rest of the process. 
So much for a tutorial eh? 
Really, it's very easy so I'm going to tell you how. 
Once all the ribbons are sewn unto the sheep, I started to approximate how long I wanted the pieces to hang. At this point it's up to you, where and how you want them to hang. The longest were about 18'' and the shortest were 8''. So I glued two longest sheep across from each other, with about 2" difference in height. Then I started eyeing where to put the rest. Again, depending on the number of pieces you have and diameter of the ring, it's your call. Mine were about 9'' apart.  

Then I started gluing the ribbon to the ring, on the inside and outside part (just to make sure). 
Now its time to make the part you going to hang it with. I used four 10'' long pieces of ribbon. Spacing them out as evenly as I could hot gluing to the inside of the ring, I joined them in the middle, also with hot glue. Then made a hoop 5'' long.
Now that all the parts are glued to the ring, it's time to cover up some of the ugliness of the glue. 
I used brown (since it's one of the colors in the nursery) ribbon 1'' thick and hot glued it to the outside and the inside of the ring. Again your call on the color. 
And that was it.
I could be happier with the way this mobile turned out and honestly, every time I walk into the nursery, I love how sweet it looks. It must be my favorite piece of decoration in the room.
(Next time I will pay closer attention and snap some more pictures)
I want to wait until the entire nursery is finished to show you how it looks in the room.


January 4, 2013

La Posh Giveaway

La Posh Style Giveaway


You can win a $50 gift card from La Posh Style online store! 
Go over to Pink Peonies Blog and check out the requirements... Who wouldn't want a new top or a skirt?
Have a great weekend!

January 3, 2013

PLEH


Welcome to 2013!
I this point, I think it is safe to say I have no interesting clothes/outfits left to show you...
I have two pairs of jeans, a few sweaters and one coat which make my daily outfits that require venturing out of the house. If I'm not going anywhere, it's pajamas and more pajamas. They're kind of my thing now. Although I do have couple cute polka PJs, I doubt they would make for a good outfit post.
So since I'm not going many places lately and it's freezing cold outside, I have something else to focus on - our new house and the nursery.
I'll be cheating with window drapery and wall art, nursery letters and area rugs, and then blogging about it.
Making a space beautiful takes time and I am the worst when it comes to patience. It looks so empty and not done at the house that I want to just go buy curtains, wall art, lamps and rugs all at once to make the space look a little more homey. But at the same time I want to get it just right.
I already purchased curtains and then took them back.
Now on the second trial, so far so good..
What do you think? Red walls with chevron pattern curtains?
I'm as indecisive as I am impatient.
Help the impatient and the indecisive .

P.S. For the title I wanted to make sure that you could read HELP from the other side ;)
BLOG DESIGN BY BELLA LULU INK